Prerequisites#
IN-CORE Account A user must have an IN-CORE account. If you do not have it, see IN-CORE Account section for setting one.
Virtual environment We recommend that users get familiar with Python virtual environment managers called Miniconda or Anaconda.
These are tools that help keep code and its dependent libraries separate for different projects. If you decide, however, to use a virtual environment or manager you must do it now, in this prerequisite step.
Environment managers are available by downloading operating system specific installers. Both, Miniconda and Anaconda will include Python (Anaconda also includes a collection of over 1,500+ open source packages), so installing Python first is not needed. The
condais the preferred interface for managing installations and virtual environments with the Miniconda/Anaconda.
Python 3.9 or higherhttps://www.python.org/ It is common to have more than one Python version installed on your computer. Since we recommend using a virtual environment, your Python will be “encapsulated” by the environment with the version specified at the environment creation. Deleting the environment removes that particular Python. If you install Miniconda/Anaconda, make sure you are running the correct version of Python, for example/Users/<username>/anaconda3/bin/python.The Python big picture: Most out-of-the-box Windows installations do not come with Python pre-installed. On the other hand Mac OS and most modern Linux distributions do have Python installed. However, the version 2.7 pre-installed by Apple is no longer supported (MacOS after 10.15 Catalina will not include a default system Python at all). It is common that users download and install newer or additional version of Python. Therefore, it is always a good idea to check. Open Windows Powershell or Mac/Linux Terminal, and enter the following:
python --version
python3 --version
If you have Python installed, it will report the version number and the command
which python
shows path to Python which will be used.
Jupyter Notebookhttps://jupyter.org/ We recommend using Jupyter Notebook for running the pyIncore projects. It as an open-source application that allows you to create projects (documents) that contain live Python code, visualizations and documentation. Jupyter Notebook is already installed with Anaconda distribution; it has to be installed separately in your virtual environment on Miniconda.
In the Installation section, we provide instructions for both environment managers starting with Miniconda. Similar instructions apply to full Anaconda manager. Python 3.x is installed with both versions. The following instructions were tested for Mac, Windows and Linux 64-bit OS.
Windows 64-bit#
Download the latest Miniconda3 installer for Windows from the Miniconda web page or Anaconda3 installer from Anaconda page
Run the installer setup.
Depending on the installation you might be asked to choose from different setups.
Run the installer setup locally; select Just Me choice to avoid the need for administrator privileges.
Leave the default folder path. For your information, the default path is
C:\Users\<username>\..\miniconda3(anaconda3).Do not add Anaconda to the PATH. Do, however, register Anaconda as the default Python environment.
Open up an Anaconda prompt from the Windows Start menu. The
baseenvironment is being activated and the prompt changes to:(base) C:\Users\<user>: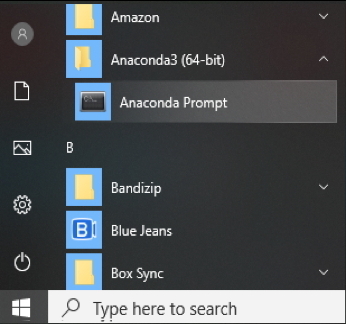
Create the python environment (for this example we choose
pyincoreEnv) and activate it (or stay in thebase):conda create -n pyincoreEnv python=3.9 conda activate pyincoreEnv
Add conda-forge package repository to your environment:
conda config --add channels conda-forge
Mac and Linux OS#
Download the latest Miniconda3 installer from the Miniconda web page or Anaconda3 installer from Anaconda page.
Run the installer setup.
Depending on the installation you might be asked to choose from different setups.
Run the installer setup locally (select the Install for me only on Mac/Linux) to avoid the need for administrator privileges.
Leave the default folder path. The path is
/Users/<username>/miniconda3oranaconda3(~/opt/for the graphical install) on Mac, and/home/<username>/miniconda3(anaconda3) on Linux.Do not add Anaconda to the PATH. Do, however, register Anaconda as the default Python environment.
Open up a Terminal. The
baseenvironment is being activated and the prompt changes to:(base)/Users/<username>or(base)/home/<username>:
Create the python environment (for this example we choose
pyincoreEnv) and activate it (or stay in thebase):conda create -n pyincoreEnv python=3.9 conda activate pyincoreEnv
You should see
pyincoreEnvin parentheses before the command prompt, meaning you set up the new virtual environment and are now using it.Add conda-forge package repository to your environment:
conda config --add channels conda-forge